Docker Compose Notes #2

Categories blog, code
whale s tail

How to set up multiple websites on docker-compose

To set up multiple websites on Docker Compose, you’ll need to create a docker-compose.yml file for each website. A docker-compose.yml file defines the services that make up your website, such as a web server and a database, and how they are connected.

Here’s an example docker-compose.yml file that defines a simple web service:

version: "3"
services:
web:
build: .
ports:
- "8000:8000"

This file defines a single service called web that is built from the current directory (.) and exposes port 8000 on the host machine.

To set up multiple websites, you’ll need to create a docker-compose.yml file for each website. Each file should define the services for the website, including any dependencies and connections between the services.

Once you have your docker-compose.yml files, you can use the docker-compose command to build and run your websites. For example, to build and run the web service defined above, you would run:

$ docker-compose build 
$ docker-compose up

This will build the web service and run it in a Docker container. You can then access the website at http://localhost:8000.

You can repeat these steps for each website you want to set up with Docker Compose. This will allow you to run multiple websites on the same machine using Docker.

How to set up multiple websites on docker-compose using the same ports

To set up multiple websites on Docker Compose using the same ports, you’ll need to use a reverse proxy to route incoming requests to the correct website. A reverse proxy is a server that receives incoming requests and forwards them to the appropriate service based on the hostname or other information in the request.

To set up a reverse proxy for your websites, you’ll need to do the following:

  1. Create a docker-compose.yml file for each website, as described in the previous answer. Make sure that each website’s services are listening on different ports.
  2. Create a new service in your docker-compose.yml file for the reverse proxy. This service should run a reverse proxy server, such as nginx or Apache, and be connected to all other services in your docker-compose.yml file.
  3. Configure the reverse proxy to route incoming requests to the correct service based on the hostname or other information in the request. For example, if you have two websites, example.com and example.org, you would configure the reverse proxy to forward requests for example.com to the service for that website and requests for example.org to the service for that website.
  4. Use the docker-compose command to build and run your services, including the reverse proxy.

With this setup, incoming requests to your websites will be routed by the reverse proxy to the correct service, allowing you to use the same ports for multiple websites.

Docker Notes #1

Categories blog, code
whale s tail

How do you setup docker for multiple projects?

To set up Docker for multiple projects, you’ll need to create a new Dockerfile for each project. A Dockerfile is a text file containing instructions for Docker on building and setting up your project’s environment.

To create a Dockerfile for your project, follow these steps:

  1. Create a new directory for your project and navigate to it in your terminal.
  2. Create a new file called Dockerfile in your project directory.
  3. Open the Dockerfile in a text editor, and add instructions for building the environment for your project. These instructions can include commands to install dependencies, set environment variables, and more.
  4. Save the Dockerfile and close it.
  5. Use the docker build command to build a Docker image for your project based on the instructions in the Dockerfile.
  6. Use the docker run command to run the Docker image and launch your project.

You can repeat these steps for each project you want to set up with Docker. This will allow you to run multiple projects on the same machine using Docker.

Where are docker files stored?

By default, Docker stores the files that make up an image in a directory called /var/lib/docker on the host machine. This directory contains all of the files for the Docker images installed on the host machine.

You can use the docker inspect command to see the exact location of the files for a specific Docker image. For example, to see the files for the ubuntu image, you would run:

$ docker inspect ubuntu

This will output a JSON object that contains information about the ubuntu image, including the location of its files on the host machine.

Note that you should not modify the files in the /var/lib/docker directory directly, as doing so can cause problems with your Docker installation. Instead, use the Docker command-line interface to manage your images and containers.

PHP – 10 helpful PHP functions and snippets

Categories blog, code

Sanitize database inputs

When inserting data in your database, you have to be really careful about SQL injections and other attempts to insert malicious data into the db. The function below is probably the most complete and efficient way to sanitize a string before using it with your database.

function cleanInput($input) {

  $search = array(
    '@<script[^>]*?>.*?</script>@si',   // Strip out javascript
    '@<[\/\!]*?[^<>]*?>@si',            // Strip out HTML tags
    '@<style[^>]*?>.*?</style>@siU',    // Strip style tags properly
    '@<![\s\S]*?--[ \t\n\r]*>@'         // Strip multi-line comments
  );

    $output = preg_replace($search, '', $input);
    return $output;
  }
?>
<?php
function sanitize($input) {
    if (is_array($input)) {
        foreach($input as $var=>$val) {
            $output[$var] = sanitize($val);
        }
    }
    else {
        if (get_magic_quotes_gpc()) {
            $input = stripslashes($input);
        }
        $input  = cleanInput($input);
        $output = mysql_real_escape_string($input);
    }
    return $output;
}

Here’s some examples of use:

<?php
  $bad_string = "Hi! <script src='http://www.evilsite.com/bad_script.js'></script> It's a good day!";
  $good_string = sanitize($bad_string);
  // $good_string returns "Hi! It\'s a good day!"

  // Also use for getting POST/GET variables
  $_POST = sanitize($_POST);
  $_GET  = sanitize($_GET);
?>

Source: http://css-tricks.com/snippets/php/sanitize-database-inputs/

Calculate distance between two points

Want to be able to calculate the distance between two points? The function below use the latitude and longitude of two locations, and calculate the distance between them in both miles and metric units.

function getDistanceBetweenPointsNew($latitude1, $longitude1, $latitude2, $longitude2) {
    $theta = $longitude1 - $longitude2;
    $miles = (sin(deg2rad($latitude1)) * sin(deg2rad($latitude2))) + (cos(deg2rad($latitude1)) * cos(deg2rad($latitude2)) * cos(deg2rad($theta)));
    $miles = acos($miles);
    $miles = rad2deg($miles);
    $miles = $miles * 60 * 1.1515;
    $feet = $miles * 5280;
    $yards = $feet / 3;
    $kilometers = $miles * 1.609344;
    $meters = $kilometers * 1000;
    return compact('miles','feet','yards','kilometers','meters'); 
}

Example:

$point1 = array('lat' => 40.770623, 'long' => -73.964367);
$point2 = array('lat' => 40.758224, 'long' => -73.917404);
$distance = getDistanceBetweenPointsNew($point1['lat'], $point1['long'], $point2['lat'], $point2['long']);
foreach ($distance as $unit => $value) {
    echo $unit.': '.number_format($value,4).'<br />';
}

Source: http://www.inkplant.com/code/calculate-the-distance-between-two-points.php

Get all tweets of a specific hashtag

Here’s a quick and easy way to get all tweets of a specific usage using the useful cURL library. The following example will retrieve all tweets with the #cat hashtag.

function getTweets($hash_tag) {

    $url = 'http://search.twitter.com/search.atom?q='.urlencode($hash_tag) ;
    echo "<p>Connecting to <strong>$url</strong> ...</p>";
    $ch = curl_init($url);
    curl_setopt ($ch, CURLOPT_RETURNTRANSFER, TRUE);
    $xml = curl_exec ($ch);
    curl_close ($ch);

    //If you want to see the response from Twitter, uncomment this next part out:
    //echo "<p>Response:</p>";
    //echo "<pre>".htmlspecialchars($xml)."</pre>";

    $affected = 0;
    $twelement = new SimpleXMLElement($xml);
    foreach ($twelement->entry as $entry) {
        $text = trim($entry->title);
        $author = trim($entry->author->name);
        $time = strtotime($entry->published);
        $id = $entry->id;
        echo "<p>Tweet from ".$author.": <strong>".$text."</strong>  <em>Posted ".date('n/j/y g:i a',$time)."</em></p>";
    }

    return true ;
}

getTweets('#cats');

Source: http://www.inkplant.com/code/get-twitter-posts-by-hashtag.php

Applying Even/Odd Classes

When generating lists or tables using php, it is super useful to apply even/odd classes to each row of data in order to simplify CSS styling.

Used inside a loop, class names would be named .example-class0 and .example-class1 alternating. Increasing the “2″ number allows you to increment in thirds or fourths or whatever you need:

<div class="example-class<?php echo ($xyz++%2); ?>">

Source: http://css-tricks.com/snippets/php/applying-evenodd-classes/

Email error logs to yourself

Instead of publicly displaying possible errors on your website, why not using a custom error handler to email error logs to yourself? Here’s a handy code snippet to do it.

<?php

// Our custom error handler
function nettuts_error_handler($number, $message, $file, $line, $vars){
	$email = "
		<p>An error ($number) occurred on line 
		<strong>$line</strong> and in the <strong>file: $file.</strong> 
		<p> $message </p>";
		
	$email .= "<pre>" . print_r($vars, 1) . "</pre>";
	
	$headers = 'Content-type: text/html; charset=iso-8859-1' . "\r\n";
	
	// Email the error to someone...
	error_log($email, 1, 'you@youremail.com', $headers);

	// Make sure that you decide how to respond to errors (on the user's side)
	// Either echo an error message, or kill the entire project. Up to you...
	// The code below ensures that we only "die" if the error was more than
	// just a NOTICE. 
	if ( ($number !== E_NOTICE) && ($number < 2048) ) {
		die("There was an error. Please try again later.");
	}
}

// We should use our custom function to handle errors.
set_error_handler('nettuts_error_handler');

// Trigger an error... (var doesn't exist)
echo $somevarthatdoesnotexist;

Source: http://net.tutsplus.com/tutorials/php/quick-tip-email-error-logs-to-yourself-with-php/

Automatically creates variables with the same name as the key in the POST array

This snippet is very helpful for every POST processing. All you need is an array with expected keys in the POST array. This snippet automatically creates variables with the same name as the key in the POST array. If the key is not found in the POST array the variable is set to NULL. Basically you dont need to write:

$username=$_POST["username"];
$age=$_POST["age"];
etc.

This snippet will do this boring part of every PHP code with POST handling so you can fully focus on a validation of the input, because that is much more important.

<?php
$expected=array('username','age','city','street');
foreach($expected as $key){
    if(!empty($_POST[$key])){
        ${key}=$_POST[$key];
    }
    else{
        ${key}=NULL;
    }
}
?>

Source: http://www.catswhocode.com/blog/snippets/automatically-creates-variables…

Download & save a remote image on your server using PHP

Here’s a super easy and efficient way to download a remote image and save it on your own server.

$image = file_get_contents('http://www.url.com/image.jpg');
file_put_contents('/images/image.jpg', $image); //save the image on your server

Source: http://www.catswhocode.com/blog/snippets/download-save-a-remote-image…

Create data uri’s

Data uri’s can be useful for embedding images into HTML/CSS/JS to save on HTTP requests, at the cost of maintainability. You can use online tools to create data uri’s, or you can use the simple PHP function below:

function data_uri($file, $mime) {
  $contents=file_get_contents($file);
  $base64=base64_encode($contents);
  echo "data:$mime;base64,$base64";
}

Source: http://css-tricks.com/snippets/php/create-data-uris/

Detect browser language

When developing a multilingual website, I really like to retrieve the browser language and use this language as the default language for my website. Here’s how I get the language used by the client browser:

function get_client_language($availableLanguages, $default='en'){
	if (isset($_SERVER['HTTP_ACCEPT_LANGUAGE'])) {
		$langs=explode(',',$_SERVER['HTTP_ACCEPT_LANGUAGE']);

		foreach ($langs as $value){
			$choice=substr($value,0,2);
			if(in_array($choice, $availableLanguages)){
				return $choice;
			}
		}
	} 
	return $default;
}

Source: http://snipplr.com/view/12631/detect-browser-language/php-detect-browser-language

Add (th, st, nd, rd, th) to the end of a number

This simple and easy function will take a number and add “th, st, nd, rd, th” after it. Very useful!

function ordinal($cdnl){ 
    $test_c = abs($cdnl) % 10; 
    $ext = ((abs($cdnl) %100 < 21 && abs($cdnl) %100 > 4) ? 'th' 
            : (($test_c < 4) ? ($test_c < 3) ? ($test_c < 2) ? ($test_c < 1) 
            ? 'th' : 'st' : 'nd' : 'rd' : 'th')); 
    return $cdnl.$ext; 
}  
for($i=1;$i<100;$i++){ 
    echo ordinal($i).'<br>'; 
} 

Source: http://phpsnips.com/snip-37


reblogged from cats who code

java – Create a Dictionary from a text file.

Categories code

It takes a text file as input and outputs all the words in that file in alphabetical order, one word per line, ignoring duplicates.

[cc lang=”java” tab_size=”2″ lines=”105″]
import java.io.*;

import java.util.*;
public class Dictionary {

public static void main(String[] args) {

try{

FileReader fr = new FileReader(“words.txt”);

BufferedReader br = new BufferedReader(fr);

String s;

String word = null;

String[] arrayWords;

ArrayList aListWords = new ArrayList();

int j = 0;while((s = br.readLine()) != null) {

Scanner scan = new Scanner(s);

while (scan.hasNext()) {

word = scan.next().toLowerCase();

aListWords.add(word);

j++;

}

}

br.close();

fr.close();

removeDuplicates(aListWords);

Collections.sort(aListWords);

int size = aListWords.size();

for(int i = 0; i < size ; i++){

System.out.println( aListWords.get( i ) );

}

System.out.println(j);

} catch (Exception e){//Catch exception if any

System.err.println(“Error: ” + e.getMessage());

}

}

public static void removeDuplicates(ArrayList aList) {

HashSet h = new HashSet(aList);

aList.clear();

aList.addAll(h);

}

}
[/cc]

Java – How to add a spell checker to Swing GUI text components JOrtho Library and Wikitionary Dictionaries

Categories code

This tutorial uses JOrtho, a Java based spell checker, to implement a spell checker in a Swing based application.

We are going to use an English dictionary throughout this guide, though other languages are available by downloading your language dictionary from http://www.wiktionary.org/

JOrtho (Java Orthography) is an Open Source spell-checker entirely written in Java. Its dictionaries are based on the free Wiktionary project and can therefore be updated for virtually any language. The library works with any JTextComponent from the Swing framework. This includes JTextPane, JEditorPane and JTextArea.

1) Firstly, get a copy of the JOrtho libraries available here.

Once you have a copy of the zip file you’ll extract the contents and find a file named jortho.jar.

Add the jar file to your classpath or project; In Netbeans, for example, right-click your project and select Properties. Select Libraries from the Categories context menu and hit Add JAR/Folder. Navigate to the folder containing jortho.jar, select the file and click Open.


lib1 lib2

Once successfully completed you’ll see jortho.jar under the libraries node in the object explorer.

2) Download/Create the dictionary file for your desired language.

You can create & compile your own dictionary from data available at http://www.wiktionary.org/ with instructions found here.

Create a folder named dictionary within the src folder of your application (src/dictionary/) and copy in two files from the downloaded zip:

  • dictionary_en.ortho
  • dictionaries.cnf

dic

Dictionaries.cnf will open in a text editor where you’ll see a comma-separated list of supported languages. Remove any languages not supported in your project.

We will change the following line: languages=de,en,it,fr,es,ru
to: languages=en

dicCNF

3) We can now head over to your development environment and begin coding the spell checker.

Well assume you’ve already started your project, your GUI is built and that it contains one or more text input elements on a form.

Edit your code to include the following two import statements at the head of the document:

[cc lang=”java” tab_size=”2″ lines=”2″]
import com.inet.jortho.SpellChecker;
import com.inet.jortho.FileUserDictionary;
[/cc]

Add the following lines of code to initialise and register the dictionary:

[cc lang=”java” tab_size=”2″ lines=”7″]
//FILE LOCATION OF DICTIONARY
String userDictionaryPath = “/dictionary/”;
//SET DICTIONARY PROVIDER FROM DICTIONARY PATH
SpellChecker.setUserDictionaryProvider(new FileUserDictionary(userDictionaryPath));
//REGISTER DICTIONARY
SpellChecker.registerDictionaries(getClass().getResource(userDictionaryPath), “en”);
[/cc]

Finally, register the Swing text components with the spell checker. You can register as many components as required by your application by substituting the placeholder field names with the name of your components:

[cc lang=”java” tab_size=”2″ lines=”3″]
SpellChecker.register(jTextField1);
SpellChecker.register(jTextArea1);
SpellChecker.register(jTextPane1);
[/cc]

We’ll clean things up by placing the spell checker initialisation code within a method, which we’ll call on application start up:

Screen Shot 2014-11-10 at 17.29.00


4) Compile & run your application!

That’s all you need to include the JOrtho spell checker in your Java Swing application. Run your app and test the theory by typing a mixture of correctly & incorrectly spelt word in the input form. Misspelt words are highlighted by a red zig-zag line underneath. Right-click on the word to reveal the pop-up suggestion list.

4b 4a 4


5) Customising the suggestion pop-up

We’re supporting only the English language in our app so we have no need to display the language selector in our pop-up menu.

I’d also like to ignore case, set a limit of 10 alternative suggestions, ignore ALL CAPS WORDS & ignore words with numb3rs – all configurable with a custom pop-up menu.

Add three more imports into your code:

[cc lang=”java” tab_size=”2″ lines=”3″]
import com.inet.jortho.SpellCheckerOptions;
import javax.swing.JPopupMenu;
import com.inet.jortho.PopupListener; //for options when got to that part
[/cc]

Initialise a SpellCheckerOtions object:

[cc lang=”java” tab_size=”2″ lines=”1″]
SpellCheckerOptions sco = new SpellCheckerOptions();
[/cc]

Configure the options as required by your application:

[cc lang=”java” tab_size=”2″ lines=”7″]
sco.setCaseSensitive(false);
sco.setSuggestionsLimitMenu(10);
sco.setLanguageDisableVisible(false);
sco.setIgnoreAllCapsWords(true);
sco.setIgnoreWordsWithNumbers(true);
JPopupMenu popup = SpellChecker.createCheckerPopup(sco);
[/cc]

Finally, add the customised pop-up menu to the components as required:

[cc lang=”java” tab_size=”2″ lines=”2″]
jTextField1.addMouseListener(new PopupListener(popup));
[/cc]

Once again, we’ll clean things up by placing the SpellCheckerOtions initialisation code within a method, which we’ll call right after initialiseSpellChecker():

5

You’ll notice the pop-up menu go straight into the suggestions list with the customisations described above:

5a


LINKS

Wikitionary.org: http://www.wiktionary.org/
JOrtho: http://jortho.sourceforge.net/


Ten Time-Savers in NetBeans

Categories code

The NetBeans IDE(Integrated Development Environment) has come a very, very long way. Our Java curriculum development group uses this tool everyday in the development of training materials and NetBeans is the default development environment for students. As a result, we have compiled a set of ten time saving features that we thought you ought to know about this powerful tool – features that make the development of Java software easier. So counting down the top ten (and these are no particular order), let’s start by reducing the amount of typing needed for common methods.

Number 10: Use typing shortcuts!

Two of my most used shortcuts are psvm and sout. Huh?

NetBeans has defined a number of code templates (abbreviations) to reduce the amount of typing required for common methods, field declarations and more. The two that I use the most are “psvm” to declare a public static void main (String args[]) { method, and “sout” to declare a System.out.println(“”); method. To use this functionality, simply put the cursor into you Java class and type the characters, psvm, followed by the Tab key:

That’s a lot less typing! My second most used shortcut is sout, to create a standard console printed message:

Notice that NetBeans also places the cursor in exactly the right place – you simply start typing right after the Tab key. A list of shortcuts and a number of other helpful features are listed on the NetBeans ReferenceCard, which is available through the Help menu or online at http://netbeans.org/project_downloads/usersguide/shortcuts-72.pdf. You can view the complete list by opening the Tools->Options menu within NetBeans and viewing the Editor->Code Templates and the Keymap sections. There you can view, customize, and even define your own shortcuts.

Number 9: Comment out a block of code

Sometimes you need to comment out a block of code, either to test to see if something is working (or broken) and sometimes because you changed your thinking on some program logic. I find that deleting code is not a good idea – you might find that what you thought you didn’t need was actually really important! So instead, select the code and comment it out in a one action with Ctrl-Shift-C. And, by the way, it works in reverse too – uncomment that code later with the same key sequence. If you prefer using the mouse, you can also use the buttons  at the top of the editor window to comment and uncomment.

Number 8: Use global replace

Sometimes you create a field or a method name that after careful thought, well, it just isn’t right…. Rather than hunting through a long class and laboriously replacing each occurrence one at a time, NetBeans has a way to replace every instance in your class all at once!

For example, in this code fragment, empArray really doesn’t say what this field will contain – and, it isn’t even an array. So what I really want is to rename every instance of empArray to employeeData, all at once. Simply click in the field, and all of the fields in the class will highlight. Then press Ctrl-R (or right-click and then Refactor -> Rename) to start replacement.

Voila! Note: unfortunately, this doesn’t work if your code has unsresolved elements – so do this after your code compiles correctly.

Number 7: Use auto format

Nobody likes ugly code! In fact, 4 out 5 Java developers will refuse to work on code that is not properly formatted. Ok, I made that up. But imagine that you are trying to debug the code on the left (with apologies to the Java tutorial). To make it easier to read, and determine the actual flow, simply press Alt-Shift-F (or right-click and choose Format) to reformat the code. the result is the image on the right. This feature will also take care of leading and trailing space – it does not remove blank lines between code lines, which is nice if you want to separate methods and fields from each other.

Number 6: Which file am I working on?

As course developers, we often have files with the same name that belong to different projects open in the editor at the same time. One file belongs to practice 1, and the other practice 2. More than once I’ve been editing a file only to discover it was in a different project than the one I had open. There is a great feature in NetBeans to determine which project a file belongs to. In the image below, I have two Employee.java files open. If I click in the file and press ” style=”background-color: #ffff00;” class=”bki-span”>Ctrl-Shift-1 (or right-click on the tab that contains the file name and choose “Select in Projects”), the project that contains that file will open in the Project Tab and highlight the file.

Number 5: Close all open files

At some point, you will have opened 10, 20 or more Java class files, XML files, and other assorted files all at the same time. Sometimes, when there are that many files open, trying to remember what you were working on and what you need to do becomes overwhelming. The answer? Reboot. No, not your machine, reboot your editor pane! Press Ctrl-Shift-F4 and all of the open file will close. If you had any open with unsaved edits, you will get a prompt to save the files. Then you can start your thinking process again with a clean slate.

Number 4: Fix imports automatically

When you are writing code, stopping your train of thought to track down a missing import statement, and resolve compilation errors such as “cannot find symbol” could be a tedious chore if you had to do it yourself. One of my favorite features in NetBeans is Ctrl-Shift-I (Fix Imports). This simple keystroke combination will track down missing import statements and fill them in for you, automatically. And if there are two classes with the same name in different packages and Fix imports can’t figure out which class you want from the other import statements, it will allow you to choose which one you mean to include.

But wait, there’s more! Fix imports will also remove extraneous imports and order them, neat and tidy!

Number 3: Make the javadoc work for you – use autocomplete!

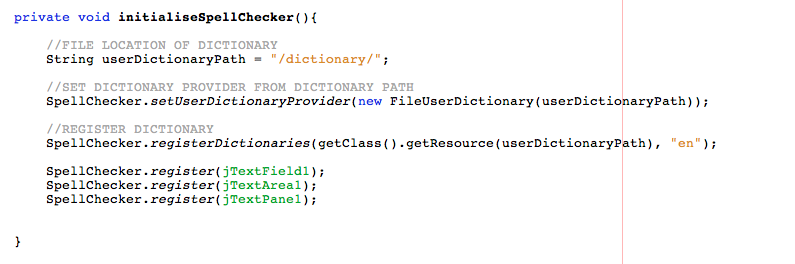
Anyone who has memorized the entire javadoc, all the packages, classes and methods, well, that person has too much time on their hands! When we are coding, we understand what we are trying to do in the code, but not necessarily all of the method names and parameter syntax. Instead, make sure that you have the javadocs you need and use autocompletion to help choose which method you want, which field, which enum, even which tag in JSF and JSP files. Simply type a part of a class, a method name or the . (dot) to evaluate which method the object can call and press Ctrl-Space.

BTW, because NetBeans is always trying to help out, you may have seen this popup and go away without really knowing how to get it back, so know you know – Ctrl-Space. Notice in this simple example, I typed part of the ubiquitous System.out, and then after the dot pressed Ctrl-Space and selected the append method. On top is the javadoc and below is the method signature I could select simply by clicking on it.

Number 2: Auto-generate getters and setters, constructors and more!

The JavaBeans pattern is one of the most used coding patterns. Simply put, a JavaBeans has properties that are accessed or mutated through methods. Most often the properties represent fields in your class. The property methods follow a pattern, with getXXXX and setXXXX, where XXXX is the property (field) name. The simplest way to generate this code is to create your class, add the fields you want, click in the line after the fields and select Alt-Insert to open the Generate dialog and choose Getter and Setter. Then individually choose the fields, or select the class to generate a getter and setter for every field!

Poof! As if by magic I have a set of 5 getters and 5 setters inserted into my Employee class.

Using the same Generate feature above, you can also generate constructors, loggers, override Object equals, hashcode and toString, override methods of the parent class and more.By generating a constructor and then just getter methods, you have a nice immutable class.

Number 1: Compare files to see what’s changed

Probably the best kept secret of NetBeans is the Diff Tool. We use this tool a great deal when creating training, as the labs we write tend to be on a single project that changes from one lab forward to the next. As a result, we often have copies of classes with differences based on the lab. However, for anyone creating copies of files and making changes between copies, this tool is an absolute time saver! Simply select one file, then click Tools -> Diff and choose the second file. they don’t have to be the same name or even be open at the same time.

As shown in the image below, the diff tool has two modes, one to graphically show the differences and a textual differences tool as well. You can swap left and right, export the differences to another file and even set the granularity of the differences with Options. But if you’re like me, just the standard graphical view tells the whole story in glorious color!


source

How To Edit Your PATH Environment Variables On Mac OS X

Categories code

If you are new to Mac OS X, you may need to know how to edit your PATH. The good news is that this is an easy task on Mac OS X.

The recommended way is by editing your .bash_profile file. This file is read and the commands in it executed by Bash every time you log in to the system. The best part is that this file is specific to your user so you won’t affect other users on the same system by changing it.

Step 1: Open up a Terminal window (this is in your Applications/Utilites folder by default)

Step 2: Enter the follow commands:

touch ~/.bash_profile; open ~/.bash_profile

This will open the .bash_profile file in Text Edit (the default text editor included on your system). The file allows you to customize the environment your user runs in.

Step 3: Add the following line to the end of the file adding whatever additional directory you want in your path:

export PATH="$HOME/.rbenv/bin:$PATH"

That example would add ~/.rbenv to the PATH. The $PATH part is important as it appends the existing PATH to preserve it in the new value.

Step 4: Save the .bash_profile file and Quit (Command + Q) Text Edit.

Step 5: Force the .bash_profile to execute. This loads the values immediately without having to reboot. In your Terminal window, run the following command.

source ~/.bash_profile

That’s it! Now you know how to edit the PATH on your Mac OS X computer system. You can confirm the new path by opening a new Terminal windows and running:

echo $PATH

You should now see the values you want in your PATH.

The instructions now use the .bash_profile method of editing your PATH. This is preferred as it keeps the changes specific to your user. I also updated the instructions to use Text Edit instead of vim so it is easier for a beginner.